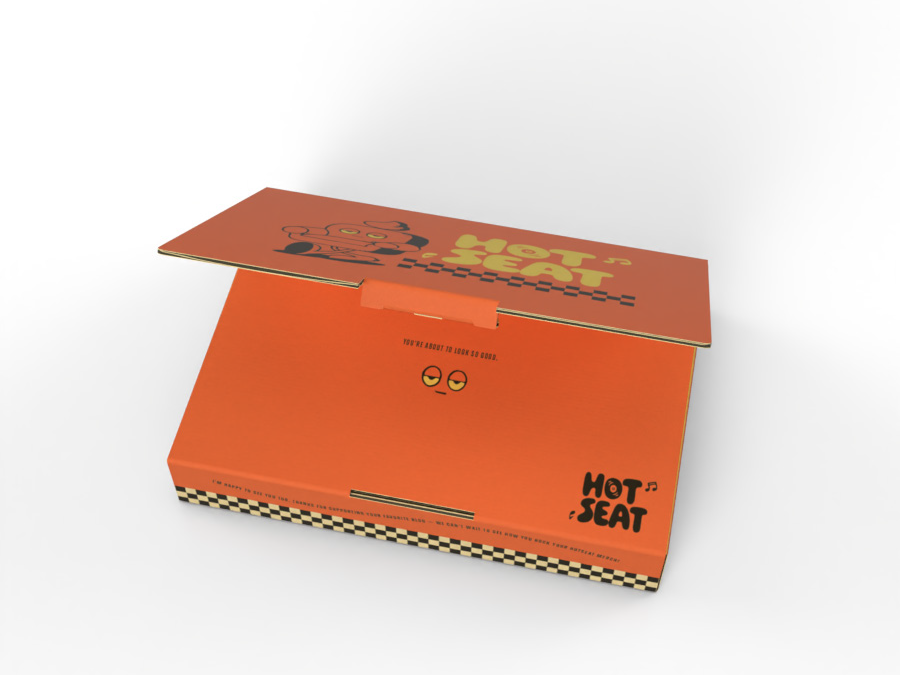
This case study delves into the product design process of creating an interactive PR box for Ipsy/BoxyCharm, an American beauty company. The project aimed to apply the principles of human-computer interaction (HCI) to developing a new physical interactive product that incorporates sensors and actuators.
The study will cover all aspects of the product development process, including market research, idea generation, design process, technical implementation and prototyping, proposed changes for a higher-resolution prototype, manufacturing feasibility, and personal reflection.
Throughout this product design process, I have enhanced my design skills from both graphic and engineering perspectives. I have improved my abilities in prototyping, user research, critical thinking, visual communication, wiring, and programming.
Before
After
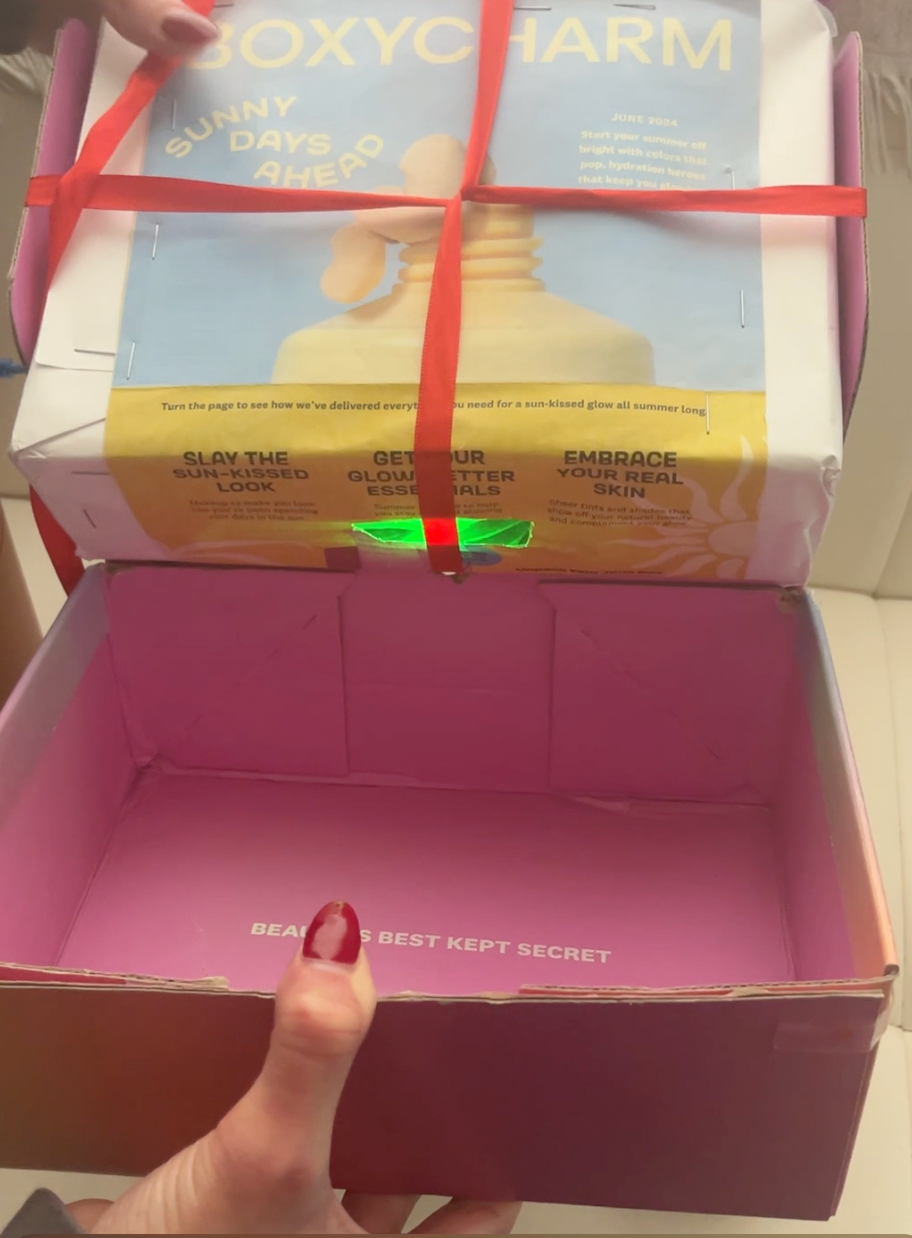
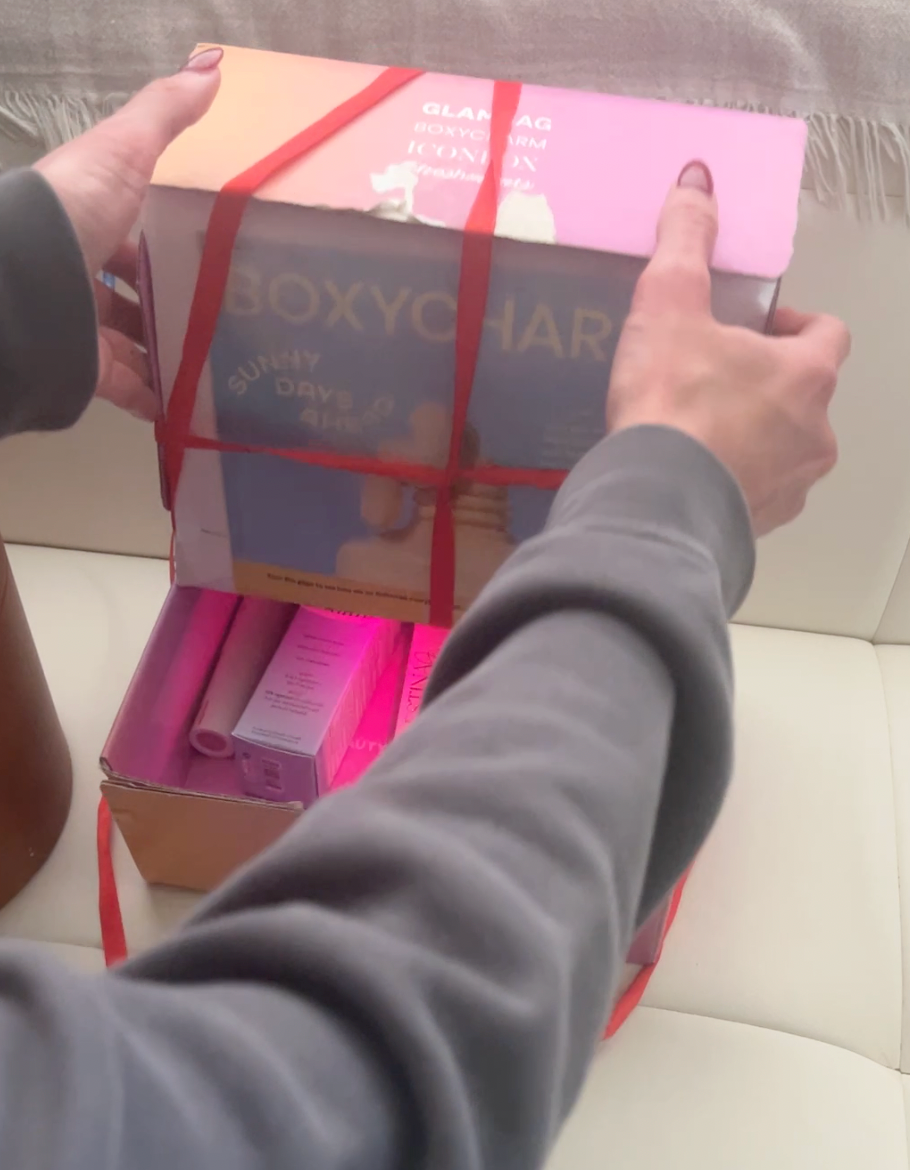
Essentially, I reworked an ordinary PR Box to feature a rainbow light show effect that illuminates the enclosed beauty products when opened. I achieved this through the use of Arduino electronic components, C++ code, and random items lying around my house.
Market Research
BoxyCharm and Ipsy, once rival brands, have now merged into a single brand offering monthly beauty subscription services. Subscribers pay approximately $30 per month to receive a box containing five full-size makeup or skincare products, with a total value of around $200. This represents a substantial saving and an excellent opportunity for beauty enthusiasts to explore premium products.
The beauty subscription box market includes several competitors:
Birchbox: Known for personalized beauty samples based on user profiles.
Allure Box: Offers a curated selection of products by the editors of Allure magazine.
The 14 Best Makeup Subscription Boxes in 2024: This article ranks the top beauty subscription services based on features like cost, content, and customization.
Target Audience and User Needs
The primary users are individuals eager to try premium beauty products at a discounted price. This demographic includes influencers, beauty enthusiasts, and people keen on staying abreast of the latest makeup and skincare trends. The target audience primarily consists of individuals aged 16-30 who are deeply engaged with beauty and fashion trends.
Idea Generation
When first starting this project, I came up with two main ideas:
Idea 1: Box with RGB LED Actuator
Concept: Integrate an RGB LED actuator inside the box that illuminates beauty products with colorful lights when opened.
User Interaction: The lights would be set to a specific color theme matching the box's contents, or randomly cycle through colors to create an engaging unboxing experience.
Target User Alignment: This feature enhances the unboxing experience, making it more shareable on social media platforms like Instagram and YouTube, catering to influencers and beauty enthusiasts who enjoy showcasing their hauls.
Idea 2: Box with Servo Motor that moves wheel when opened
Concept: Integrate a servo motor that rotates a spinning wheel listing the box contents when the box is opened.
User Interaction: The wheel would be activated by a sensor that detects the opening of the box.
Target User Alignment: This feature enhances the sensory experience of unboxing, appealing to
subscribers who appreciate a multi-sensory interaction with their beauty products.
After researching, receiving feedback, and considering my classmates' ideas, I ultimately chose my original concept. Since another student was creating a PR box with a Servo motor, I wanted my project to stand out. Missing the lab where teams were assigned meant I had to complete the term project solo while others worked in groups of four. This was certainly a challenge, but I’m grateful for the skills I gained along the way.
Design Process
User Description
Persona 1:
Name: Emily
Age: 22
Occupation: College Student and Beauty Influencer
Goals: To stay updated with the latest beauty trends, share engaging content with her followers, and discover new premium products at a reasonable price.
Pain Points: Difficulty finding affordable yet high-quality beauty products and the need for unique content ideas to maintain follower engagement.
Persona 2:
Name: Sarah
Age: 28
Occupation: Marketing Professional
Goals: To find reliable beauty products that enhance her daily routine, enjoy a luxurious unboxing experience, and get good value for her money.
Pain Points: Limited time to research and shop for new products and a desire for a more personalized beauty experience.
Emily and Sarah need an engaging, sensory-rich unboxing experience that not only provides high-quality beauty products but also enhances their overall enjoyment and encourages social media sharing to increase brand awareness.
Ideation and Concept Development
My idea is to have the RGB LED turn on when the box is opened, producing a sort of rainbow light show illuminating the beauty products inside. At first, I was going to use a Force Sensing Resistor (FSR) or pressure sensor to activate the light, but I got it confused with the push button on Tinkercad, so my schematic wasn't much help. I was under the impression that a button alone is not a valid sensor for this project (and I wanted more of a challenge anyway), so I reevaluated my sensor options.
I looked into the feasibility of quite a few different sensors while I figured out how to best execute my vision. Since I ordered the Arduino Super Starter Kit on Amazon and did all of the physical wiring at home, I had an overwhelming amount of options. However, it was very satisfying and intellectually stimulating to play around with the different components (I got a bit carried away).
The sensors that I legitimately considered and spent time researching are:
- Pressure Sensor: Measures absolute pressure by detecting changes in pressure applied to a specific area.
- Force Sensing Resistor (FSR): Measures force or pressure by detecting changes in its electrical resistance when physical pressure is applied to its surface.
- Photoresistor: Detects the presence of light, or lack thereof, in the room when the box is opened.
- IR (Infrared) Break Beam Sensor: Think of a garage door—you have to step over the invisible beam when it's closing/opening because otherwise it will detect motion and stop—this sensor in my box would detect a beam obstruction near the bottom of the box when opened. This would require something that moves with the lid of the box.
- Ultrasonic Distance Sensor: Detects increased distance when the box is opened.
- Tilt Ball Switch (the sensor I ultimately chose): Detects basic motion/orientation. A tiny ball in the switch rolls when motion is detected, triggering a contact of metal terminals. This generates the conductive or non-conductive status (aka, ON or OFF). I actually had no idea what this was until I found it in my Arduino kit and did some experimentation.
It was a literal lightbulb moment: When the box opens, the Tilt Ball Switch will move from a horizontal to a vertical position, causing the RGB LED to illuminate. It was undeniably the most logical, seamless, and straightforward way to make the box light up because the user will not know what triggers the light show (if I can manage to cover the electronic components well). This effect is still possible with other sensors, but the Tilt Sensor seemed ideal for products where something happens in between their open and closed states—I read they are commonly used in kids' toys. It's much more of a "wow" moment for the user when the product initiates the interaction, as opposed to the user having to initiate it, such as pressing a button to activate a sound or lights. The same goes for people... everyone prefers a person who isn't going to wait around for you to talk to them first! (This sensor also had the least technical caveats. It just made the most sense to me).
Technical Implementation and Prototyping
Low-Resolution and Mid-Resolution Prototypes
As I began wiring the Tilt Ball Switch, I ran into an issue called "switch bounce".
If you watch the yellow LED closely in the following video, you'll notice it flickers when I tilt the sensor (the black cylinder plugged into the white breadboard. That's because when the sensor is pointing up, the ball rolls onto one of the metal terminals and shorts it, acting as a switch throw. Ideally, the contact should be instant but instead, the ball bounces around a bit, making the contact open, closed, open, closed, etc. It's purely a mechanical phenomenon, like dropping a ball—it bounces before finally landing on the ground. So, the signal goes up and down several times before finally stabilizing. It does this over a period of time (t). In simpler words, the light flickers on and off a few times before the intended static illumination.
However, I learned about a relatively easy programmatic fix: since the switch bounce typically occurs within a 50-millisecond window, I can reprogram the code to delay by 50 ms after a switch change is detected, eliminating the switch bounce. I learned that this process is called "debouncing". I was able to successfully eliminate the switch bounce flickering after debouncing my code, which was satisfying.
Pre-Debouncing Video
Post-Debouncing Video
As you can see, the debounced code creates a much cleaner light pattern and eliminates the unwanted flickering. At this point, I was confident I wanted to use a Tilt Ball Switch Sensor. However, I had only tested it on the built-in LED, and still needed to incorporate my own RGB LED into my breadboard and code.
My previous Tinkercad sketch and code successfully illuminated my LED, but that was using a button sensor instead of a Tilt sensor (shown below), so now it was time to rewire.
Next, I added an RGB LED to my Tilt Sensor configuration, drawing inspiration from my Tinkercad sketch above.
As the wiring became more and more complex, I realized I needed to secure my breadboard and Arduino board in a fixed position relative to each other to prevent the wires from getting yanked out of place. This led me to consider taping them to a hard surface that wasn't my desk to prevent damage; I considered the cover of an old hardback book. Then, I had a good idea—I thought to myself, "Wait a second... what if I were to remove all of the pages from the book, tape the electronic components to the inside of the book's back cover, and leave the front cover to hang down and effectively hide everything underneath?"
This came with two potential challenges. First, I needed a book the same size as the top panel of my box. Second, if it's a hardback, how will I get the light to shine through the thick cover and illuminate the box's contents?
It turns out it was my lucky day because I quickly found a book that fit almost perfectly. I considered using a soft cover book so that I could cut a hole in the cover for the light to shine through, but after messing around with the book's orientation inside the box, I realized I could glue the book's spine to the box's front/top flap. This way, the book's open side is down by the crease that hinges when the box is opened and closed, allowing the light to protrude through the book's opening. I considered putting the book's open side and thus the light at the top, but ultimately figured the bottom would make for a better user experience as there are more shadows lower down, and a darker environment will make the light appear brighter.
Next, I used Gorilla tape to secure the breadboard and Arduino down to the book's skeleton. Conveniently, the tape is even clearer than normal scotch tape, so I was able to see the Arduino board's details right through the tape (**the wiring is still very much a work in progress at this point).
Successful Tilt with Basic Red Light
Mid-Fidelity Prototyping
Once I got the code to work and produce a rainbow light show when tilted, I put tape over the small components (RGB LED, resistors, wires, and Tilt Sensor) to keep them in place once the box was moving around. I also swapped out the USB cord connecting the Arduino to my computer for a 9V battery with a snap-on connector and taped the battery down to the book. This way, the product is wireless and does not need to be connected to a computer to function, like a real product on store shelves (if I were to mass produce this box, I would opt for an affordable, thin battery with a substantial life). Then, I used cardboard to cover up the chip's built-in lights that can't be turned off. I also used some foam prong protectors from the Arduino kit to stabilize the book and protect my circuitry.
Finally, my book was ready to go into the box:
Success! Everything was exactly how I wanted it to be at this stage in the project, and I was ready to move towards a higher-resolution prototype.
Final Prototype Code:
const int tiltPin = 2; // tilt sensor pin is connected to pin 2
const int redPin = 9; // Red LED pin
const int greenPin = 10; // Green LED pin
const int bluePin = 11; // Blue LED pin
int tiltState; // the current reading from the sensor
int lastTiltState = LOW; // the previous reading from the sensor
unsigned long time = 0; // the last time the output pin was toggled
unsigned long debounceDelay = 50; // the debounce time, increase if the output flickers
void setup() {
pinMode(tiltPin, INPUT); // Set sensor pin as an INPUT pin
digitalWrite(tiltPin, HIGH); // turn on the built-in pull-up resistor
pinMode(redPin, OUTPUT); // Set RGB LED pins as OUTPUT pins
pinMode(greenPin, OUTPUT);
pinMode(bluePin, OUTPUT);
}
void loop() {
// read the state of the tilt sensor
tiltState = digitalRead(tiltPin);
// If the sensor really tilted?
if (tiltState != lastTiltState) {
// reset the debouncing timer
time = millis();
}
if ((millis() - time) > debounceDelay) {
// whatever the switch is at, its been there for a long time
// so lets settle on it!
if (tiltState == HIGH) {
rainbowEffect();
} else {
analogWrite(redPin, 0);
analogWrite(greenPin, 0);
analogWrite(bluePin, 0); // Turn off the LED
}
}
// Save the last tiltState so we keep a running tally
lastTiltState = tiltState;
}
void rainbowEffect() {
// Fade from red to green
for (int i = 0; i <= 255; i++) {
if (digitalRead(tiltPin) == LOW) return; // Stop if box is closed
analogWrite(redPin, 255 - i);
analogWrite(greenPin, i);
analogWrite(bluePin, 0);
delay(10);
}
// Fade from green to blue
for (int i = 0; i <= 255; i++) {
if (digitalRead(tiltPin) == LOW) return; // Stop if box is closed
analogWrite(redPin, 0);
analogWrite(greenPin, 255 - i);
analogWrite(bluePin, i);
delay(10);
}
// Fade from blue to red
for (int i = 0; i <= 255; i++) {
if (digitalRead(tiltPin) == LOW) return; // Stop if box is closed
analogWrite(redPin, i);
analogWrite(greenPin, 0);
analogWrite(bluePin, 255 - i);
delay(10);
}
}
Then, forcing myself to break out of any functional fixedness, I gathered a range of items lying around my house to craft a container for the book:
This was very challenging because I ran out of tape and had to rely entirely on staples. I did this so that I could wrap it with the promotional graphics that came with the box, and have it be flushed to the sides of the PR box when inserted. I accidentally made it too big, preventing me from being able to close the box completely with the beauty products inside. In the future, I would make my electronic components closer together to allow for a more compact electronic container.
Unfortunately, just when I thought everything was perfect, the RGB LED started flashing red which confused me. At first, I thought maybe I didn't use the right resistors causing it to short-circuit, but I immediately tried disconnecting the battery from the Arduino board and reconnected the board to my laptop using the USB cord. This solved the problem, so I'm assuming the battery just ran out of life.
Final Prototype
Reflection
Throughout this process, I have significantly enhanced my engineering and artistic product development skills. I have learned how to best integrate electronics (flexible, printed, traditional) into a product based on its specific needs. My prototyping skills have also improved considerably, as this project required extensive ideation and iteration. Creating prototypes, both through sketches and physical models, allowed me to evaluate and refine my concepts effectively. I have gained valuable knowledge about electronics, semiconductors, flexible batteries, and user interaction with products.
Additionally, I have developed transferable skills such as problem-solving, adaptability, and physical prototyping through the use of unexpected items and materials. I encountered numerous unexpected challenges that necessitated revisiting and rethinking wiring and sensor arrangements. This iterative process ultimately benefited both the product and my personal growth. Working alone presented unique challenges in decision-making and managing work outside of class. Effective time management and strong organizational skills were essential to thoroughly completing each project component.
In conclusion, this project has provided me with a deep understanding of Human-Centered Design and the use of interactive product development to achieve design goals. I have developed my engineering and design skills in a way that will prepare me for future success in interactive product design. I am grateful for the guidance of my professor for making this project both challenging and enjoyable.
